DEMO-OPPNET is a demonstrator of opportunistic networks. In this tutorial, we
will deploy a minimal network composed of two Linux laptops named castor and
pollux and show how to use a opportunistic application in this network.
We will assume that each laptop is equipped with a Wi-Fi interface. Ideally, this Wi-Fi interface should fully function in Ad Hoc mode, but as it is not so frequent (see our page on this topic), we will circumvent the problem if it is not the case by falling back to the use of the Access Point mode.
It is recommended that you can plug an external Wi-fi dongle that will be dedicated to the opportunistic network, keeping you internal Wi-Fi interface available for an Internet connection. This is not compulsory (of course no Internet connection is required for the kind of opportunistic network we target) but can be more comfortable if you need to continue your usual activity with the laptop, in parallel.
On each laptop, download the auto-extractible archive demo_oppnet.run.
DEMO_OPPNET depends on other software. For a Debian Bookworm distribution, the following command will install the required dependencies. Adapt the command to you own context. It is likely that the first packages (up to network-manager) are already present for a laptop. The JRE version may vary (at least Java 8). Note that the installation procedure will tell you if a dependency is missing.
sudo apt install openjdk-17-jre-headless python3 nodejs iw wpasupplicant isc-dhcp-client network-manager  \
  wireless-tools netcat-openbsd rsync inotify-tools rfkill
You can then run the auto-extractible archive, as root.
sudo sh /path/to/demo_oppnet.run -- -noenable
This installs the demo software (in /opt) and starts it automatically so that
it runs in the background. Note that we used the option that indicates that the
demo-oppnet systemd service should not be launched automatically at boot time.
Once you have installed DEMO-OPPNET on both laptops, you can check that
everything is OK. On laptop castor, open a web browser at the URL
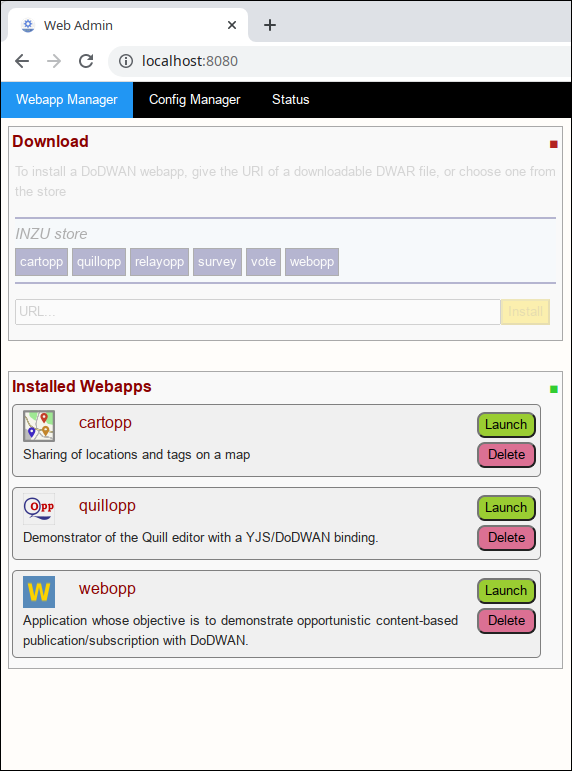
http://localhost:8080. This shows you the Webadmin GUI. The current tab is
tab 'Webapp Manager' where you should see in the lower part the three
pre-installed webapps.
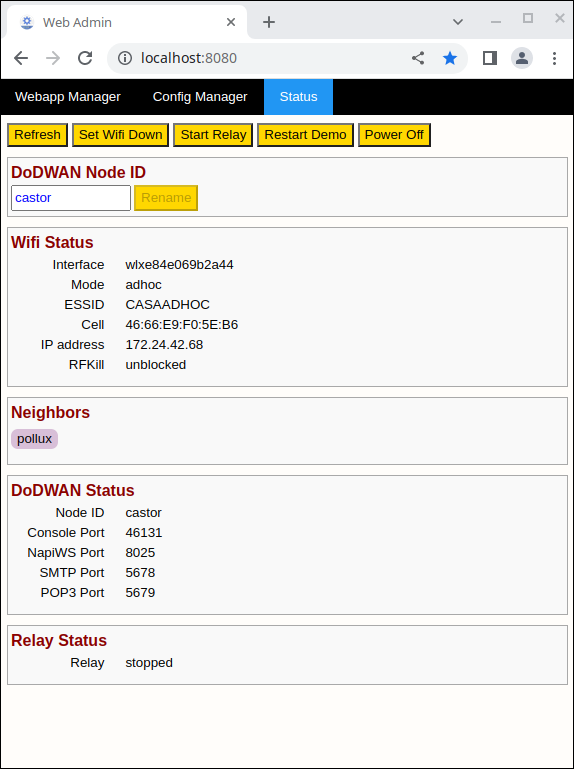
To confirm that the opportunistic network is properly set, switch to tab
'Status'. You should see that the Neihgbors include pollux. As depicted in
the Wifi Status, the built opportunistic network is based on Wi-Fi in Ad hoc
mode with the default CASAADHOC ESSID. Laptop castor has been given an IPV4
address in the private 172.24.0.0 network. Note the cell address of the ad hoc
network, that is dynamically chosen.
If everything is fine so far, you can directly go to the next section (Testing an opportunistic application).
If the neighbor zone is empty, that may mean the adhoc mode of your Wi-Fi interface is not handled by your Linux driver. You can fall back to an opportunistic network based on Wi-Fi in Access Point mode (if you have access to a Wi-Fi access point). For this, switch to tab 'Config Manager', select 'networkmanager' in the 'Wifi' drop-down list in the 'Active Mode' zone (don't forget to click on the 'Apply' button afterwards).
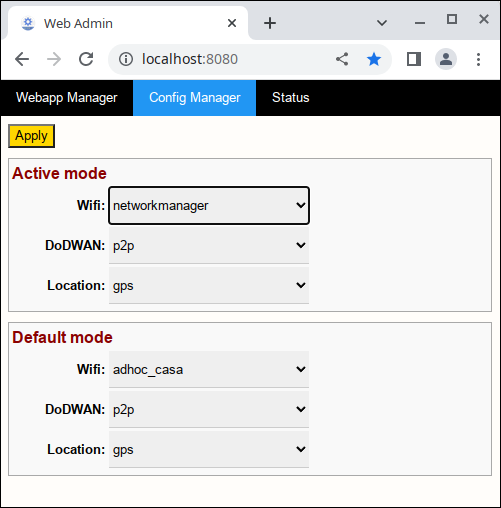
This will delegate the choice of the Wifi connection to the Linux NetworkManager. So you can establish (as usual, via you NetworkManager) a connection to the access point that will be used for the opportunistic network. A simple check on the 'Status' tab will tell you it is done.
Make the same manipulation on laptop pollux so that the opportunistic network
can be formed.
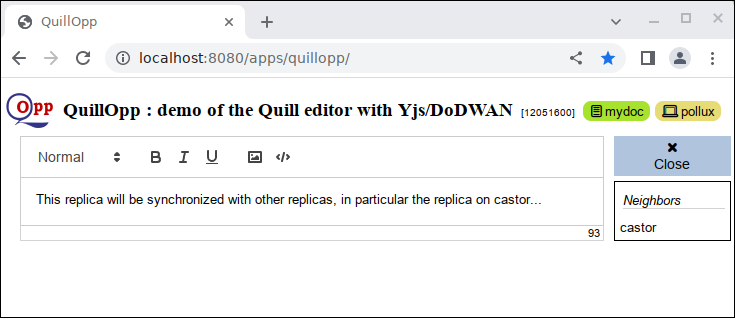
DEMO-OPPNET includes three opportunistic applications. We will first try the more intuitive one: quillopp. This application is a collaborative editor based on the use of Conflict-Free Replicated Data Types. Each device of the opportunistic network holds a replica of a document. Replicas can be modified independently. Their may temporarily diverge, but a synchronization algorithm running in the background make them eventually converge provided the synchronization graph is connected.
In the Webadmin app, switch to the first tab 'Webapp Manager' and click on the launch button associated with quillopp. You should see that castor is still a neighbor of pollux. Quillopp allows you to work on several documents. We will create one by giving it a simple name (a string of you choice, e.g. mydoc) and clicking on the '+' button.
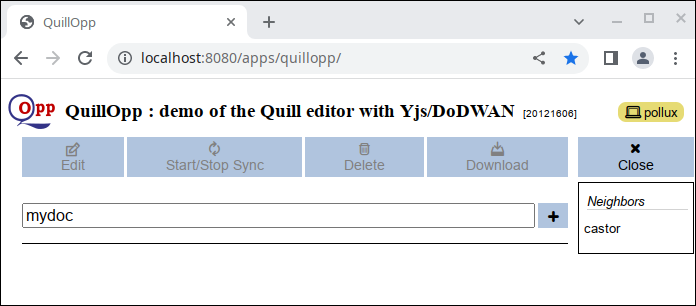
After switching to the edit mode of the chosen document (button 'Edit'), we can start typing characters in the editing zone. You should see that the document is synchronized in real time with the one edited on the neighboring laptop ('castor' in our case).
You can move with one of the laptops so that it becomes out of Wi-Fi range of its neihgbor and continue editing the documents separately on each side. The documents are no longer synchronized as no communication is possible between the two laptops. But if the laptops come close enough again, their document content will automatically converge.
To see the full potential of Quillopp, you will need to implement a slightly more sophisticated scenario with at least three laptops. Try several phases of text editing interspersed with moves that break the Wi-Fi connection.